Alright guys, I'll be the first to admit that I'm awful about keeping up with things. Blogs, journals, all seem to fall to the side because I'm so much more of a 'one sentence and done' sort of person, but I'm going to try to keep up with this as best as I can!
Unfortunately, I do have some bad news [in disguise?]. My boyfriend, myself, and two of our friends have taken on the task of moving to Portland, Oregon. Currently, that's about a four hour drive from where I live, so it's going to take a bit of work, a lot of money, and so forth. Which means that I desperately have to watch my spending and since the only thing I spend extra money on is Lolita, it's going to cut into my purchases for the next four months. We plan on moving in May, so we have the next few months to save up and plan, and if everything works out right then we'll be completely fine in doing so!
I am excited by this move, but that doesn't stop me from stressing out about having the funds to do so, which means I'm really going to buckle down and save and save as much as humanly possible. You might even see a sale or two pop up from me, depending on how desperate I get. Thankfully I have a really good support system in my friends, family, and my friends' families.
This is straying off the Lolita path however. I STILL plan on posting what I can of my orders and reviews, and this isn't going to kill me purchases entirely. They'll just be more thoughtfully done in a timely manner. --After my tax return, of course!
The ClobbaOnline order has been placed, the Bodyline order is still in effect, and wigs will be bought between now and May, but be patient with me! I've never been terribly good about doing things like this, I'm just a stresser. ILU guys, and I'm thinking about possibly doing a Puffy-Star giveaway in the future, just to kick start interactions on this blog.
Thanks ever so!
Friday, January 28, 2011
Saturday, January 22, 2011
Long Time No See [Chocomint LPs, Orders, etc]
I feel a bit guilty because I haven't kept up with this in the past week as much as I wanted to! But beyond my guilt streak... I received my Chocomint LP a few days ago and I wanted to share!!
I placed my order for Chocomint's LPs on Thursday of last week, within a day I'd received my shipping email to confirm that they could charge my account. The weekend passed and I received an email on Sunday, the Chocomint staff apologized for "taking so long to get back to me" and let me know that my items had already been shipped and provided me with a tracking number.
Before I even received my items, I must say, I was absolutely shocked by how considerate and kind the Chocomint staff was! They were incredibly quick about shipping, providing me with whatever information I needed, and even took the time to mark my package down as second-hand personal accessories, and mark the value of my package down by half! All things that never occurred to me to ask of them.
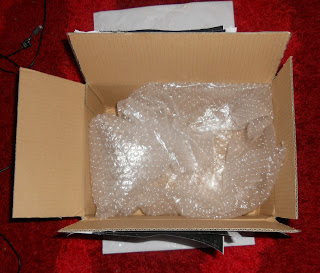
My package was received within a week of placing the order [I was honestly surprised at how quickly it came!] and I was absolutely ecstatic to have received it. Everything was packed in a large cardboard box, sealed completely, and each individual LP was wrapped in bubble wrap.
I have some after-opening pictures, as I was too excited to take pictures when I ripped into the packaging, haha.
The large sweets LP came with a ton of stuff, and I'm not quite sure if I collected it all for this photo [as I sorted everything to their proper places before feeling guilty about not posting]. The yellow thing in the middle is a macaroon, it's an interesting little thing. I also have a donut keychain that's been connected to my phone already.
Both LPs came in cute little drawstring-ribbon bags that I absolutely love and use for storage for my other Lolita items.
The candle LP was a bit of a disappointment to me, I really do love the candles but I was hoping that some of them would be small enough to turn into other accessories or make them into more useful items, but the candles are a lot larger than I thought! --Which isn't a reason to complain honestly!
My LP bag filled with my favorite sweet accessories, and the pouch that came with the LP that currently resides in my purse <3
I really do love everything that I got, and I wish Chocomint would randomly stock LPs constantly! I am so much in love with Chocomint accessories and my lucky pack was just enough to rekindle the fire.
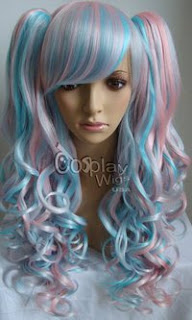
I also placed an order through Clobbaonline for a few items that I'm waiting for them to receive at their shop before they can send out to me. I hope I'm a bit more time-sensible when it comes to posting here! Also, as a late birthday gift, my mother bought me a pair of circle contacts and a mint wig from CosplayWigsUSA.
Unfortunately this isn't my dream wig from CosplayWigsUSA but I do plan on buying more than just this one! I can't wait to get this one and compare it to my mint OP!
For now, that's all I can manage to do! Hope you enjoy.
Thursday, January 13, 2011
AP's Miracle Candy Skirt V. SA's Dreamy Dollhouse Skirt, Also Bag Collection
I have already posted a comparison post for the Angelic Pretty Miracle Candy skirt and Sweet Angel's Replica Dreamy Dollhouse skirt, but I finally got around to getting pictures of everything so I'll just do short summaries of each one.
Skirt length versus skirt length. Miracle Candy's length [via my own measuring tape] is 51 CM from waist band to the end of the striped frill. Dreamy Dollhouse's length is 48 CM from waist to the end of the lace [which personally I don't count DDH's lace as "length" as it is sheer, but otherwise it would be 45.5 CM. On Hello Lace Miracle Candy is listed as 48 CM, [Brand] Dreamy Dollhouse is 46 CM.
Lace comparison. I just love the lace on Miracle Candy, if you can't tell on the pictures, it's candy and star lace. I'm not quite sure what is on the lace of the Dreamy Dollhouse skirt.
Waist tie comparisons, Miracle Candy's are detachable, Dreamy Dollhouse's are going nowhere.
The waist bow on both skirts are detachable, however, if you notice on the top right corner of the Dreamy Dollhouse bow, the threads of the rickrack aren't completely folded over and trimmed, however it's very easy to fix.
The tag and inside of the Dreamy Dollhouse skirt, the same closures, zipper and hook and eye. Skirt is fully lined and has tulle.
And the print. I would really like to get my hands on the Brand of this skirt to run a true replica vs. Brand comparison!
And my Angelic Pretty Boston Bag arrived in the mail today! Much sooner than expected!
The details for it are absolutely adorable and the bag is definitely bigger than I expected!
It'll hold everything I need to cart around when I'm dressed up, since my other bags aren't the right size at all!
The zipper pull is an adorable little bow, and the bag is completely covered in cute little hearts! I just love it, it's so cute!
I'm really pleased with the color as well. The picture that the seller used was a little bit darker than the purse actually turned out to be so I'm really happy with that!
My bag collection! My Baby, The Stars Shine Bright Usakumya tinytiny bag [barely holds a chapstick], my Sanrio Cinnamoroll backpack [holds my wallet and a cellphone], my Replica Baby Bag [there's a lot of love lost between me and this bag. I ordered it in white and received it in very-much off-white], my new Angelic Pretty Boston Bag, and an amazing gift from a friend, my Sweet! Tote Bag [which holds a ton of stuff because it's HUGE].
We are still planning on doing a Clobba order, hopefully tomorrow, and I'll be more than happy to post to see how that goes!
Tuesday, January 11, 2011
A Personal Opinion
This is my personal opinion, I do not dislike those who do not share my opinion, I simply ask the same of you.
I received my Sweet Angel Dreamy Doll House replica today! It arrived in an Angelic Pretty bag [honestly I may have been more excited for the bag!] that I painstakingly peeled the tape off of once I realized that the package was indeed simply a brand bag.
Upon opening it, I was pleased to see that the print is vibrant and very adorable, and I do indeed love it, however I was surprised by how short the skirt is. Generally speaking I am a very poofy person. I like my Lolita clothing to be poofed to the max via as many petticoats as can literally fit under the skirt. Which makes a skirt much shorter than if I were to wear it without a petticoat at all.
This skirt is about an inch and a half shorter than my Miracle Candy skirt, and it doesn't sit on my true waist at that, rather about halfway between my hip bones and my true waist, which while it's a bit more comfortable, threw me off quite a bit.
The lace is... alright. Not too terribly course, shiny, or tacky, but isn't on level with the lace that adorns my Brand clothing. The skirt itself is a lighter fabric than expected, akin almost to the cotton of a work shirt. It could use an ironing and a starching because this lighter fabric wrinkles very easily, it isn't see through though and has an apparel-lining inner skirt as well as a bit of [extremely rough] tulle at the bottom that doesn't do much to puff up the skirt.
The waist ties aren't detachable, but with the way that Brand ties rip off with the wrong tug, I'm okay with that, and I hardly have a reason to remove them in the first place.
My biggest issue, I think, is this. Most of my skirts will do a shape like this or this, but the lace at the bottom of this skirt is too tight to permit the skirt to really puff properly, so from waist band to almost-end it's a nice round shape, then it pulls it at almost a corner where the lace is.
Maybe I'm being picky, after-all I spent only thirty dollars on this skirt, however I'm not sure how I feel about replicas all in all. I got what I paid for, yes, but I've spoiled myself rotten with Brand that I'm honestly not sure how I feel about replicas and non-brand JSKs, OPs, and skirts.
Monday, January 10, 2011
I've Been A Bad, Bad Girl.
Miracle Candy! This is the coordinate I have worked out for it thus far, I am hoping to balance out all the pink with a few more blue accessories and shoes because I just love the pink x blue coordinations!
AP wrist-cuffs would be a dream come true, however I'll probably just get a pair commissioned in blue.
Secret Shop candy socks in white, I thought about getting them in blue but in case I decide to do a pinkxwhite coordination, I'm trying to stick with white [unless I give in and just buy both!]
Secret Shop shoes. I absolutely love Secret Shop shoes, and I love ones with a wedge instead of a flat or a heel! These are available for pre-order, so I'm hoping I can get my hands on a pair.
And preferably more candy-themed sax jewelry, including smaller bows for my hair.
And this gorgeous, lovely wig! I'm not a fan of half-half wigs, but this wig has been my favorite ever since I spied it on CosplayWigsUSA, so I will not resist getting it for this coord!
I'm hoping all this extra blue will balance out the mass amount of pink that is the MC skirt! I'd prefer not to be a big ball of pink if I can help it.
I'm still keeping my eyes open for coordinations for my Milky Berry OP, but there's just so much more to get for it that I can't even begin to really focus! Plus, for some reason, I am desperately, truly in love with my Miracle Candy skirt. I love the way it fits and looks!
In other news: ClobbaOnline might not be this month's group order, as with the Chinese New Year coming up they might not be able to stock my entire order. I wish I would have released this sooner, I feel so silly! Granted I'm not sure how Bodyline and Fan+Friend treat the Chinese New Year so it'll just be a matter of seeing what order will be the easiest to fill at this time of the year.
Clobba's order is as follows thus far:
- Infanta's Rose Embroidery Brass Button Coat
- Dream of Lolita's Candy Pop and Candy Treat bags
- Two Classical Puppet's A-Line Pettis
- Secret Shop Candy socks [possibly two]
- Secret Shop Strawberry socks
Hopefully I'll be able to place this order by the end of this week if all goes well! Other than that, per my title, I've got to admit that I've been bad. I said I was done ordering things until I got paid again [Hooray for trying!] and I failed [Boooo!], so the newest addition to my wardrobe is an Angelic Pretty Boston Bag.
I'm sure I'll find use for it!
I can't help what I fall in love with. ;3;
Sunday, January 9, 2011
Craft Tutorial: Puffy stars.
As there was some interest in my puffy stars, I'm making a tutorial on how to make them! This is the first time I've thrown together a tutorial, so if you have any questions or something's not clear enough just ask! <3
Things You'll Need:
- Yarn [This is the kind I'm using]
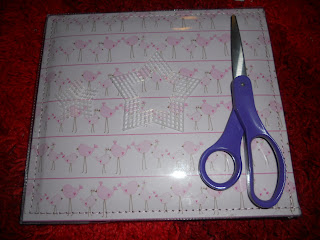
- Plastic Canvas [Stars here. This is available at my local Joann's in multiple sizes and shapes including large mats that can be cut into any shape and size!]
- Hot Glue Gun
- Scissors
- Alligator Clips or Brooch Pins
[Not Pictured]
- Decorating items, pearls, beads, rhinestones, puff balls, etc.
To make the exact ones I'm making I used the Star plastic canvas as shown here and cut out the middle of it.
After a few test stars I found that the best star-thickness, personally, is leaving the outside star at least three squares wide, any thinner and you get some pretty scrawny stars.
The smaller star you'll put aside for now, but can be used to make a two-set 'dangle' charm that I have yet to perfect.
I cut out my yarn in arm lengths, length doesn't really matter but I wouldn't suggest going much smaller as the more separate pieces you use, the lumpier the star will be. But don't go too big or you'll be tangling yourself up in the yarn! Haha.
I have a needle used for cross-stitching, it has a large eye and it mostly blunt-tipped, perfect for this craft! Thread the needle like you would if you were hand stitching, IE pull the needle through to the middle of your length of yarn and fold it over, do not knot the end!
I start in the middle of a pair of the star's 'arms', put the needle through, pull it until just about a half inch of yarn is left on the other side...
Bring the yarn over the top of the edge of the star, and back up the underside, so you're effectively covering the entire side of the star in material.
You'll get a star like this, it covers all the edges of the plastic canvas and adds to the fluff of the final project. You can choose to cut the thread here and the same half inch of extra yarn, or if you have enough yarn, you can start on the center of the star, doing the same exact thing. Up through, around the edge, and up through again.
You will have a star like this!
Trim off the excess, as long as you don't give the yarn too much of a tug through the next few steps, you'll have no problem with unraveling because the fluffy yarn tends to knot up a little bit and keep itself in place.
Next we're rethreading the needle and going back at the star, this time through the center row that should not have any yarn in it. We're going to thread it under and over to cover up the majority of the plastic, but not all of it.
Your star will end up like this. Take the ends from all the previous steps [all those little threads that are dangling about] and give them a nice dot of hot glue on one side of the star that will be the 'bottom' [this doesn't really matter as it's almost impossible to see the hot glue if you're delicate about it and your yarn is as fluffy as mine].
Your next step is to braid three pieces of yarn together and proceed to simply wrap it around the star, this will add puffiness and it isn't a time-consuming thing. If the yarn attempts to slide about, you'll need to pull it a bit tighter. A small dab of hot glue towards the points of the star will make sure the yarn stays in place and doesn't turn into a ball.
Your star will end up looking like this, if everything works out!
One thing you'll have to watch out for in this process is losing your patience. The yarn will have a tendency to get bunched up as you're pulling it through the canvas's holes. Simply stop, give the yarn a tug to untangle it, and go again. The lesser the amount you're working with, the easier it will be to thread your star.
After all of this you can go crazy, deck them out with rhinestones, puff balls, pearls, cabochons, bows, etc! A little dab of hot glue will keep these things in place rather well.
Friday, January 7, 2011
Sweets Candy ♥
So it arrived today! Shane was a dear and dutifully sat in the sitting room for an hour this morning waiting to catch the postman while I was busy at work, then he hand delivered me the package on his own way to work! He's such a sweetheart.
I think I might have stalked the shipping for this skirt more than I stalked my Milky Berry purchase, perhaps because I'd already seen all the cute little details on Milky Berry via Lindsey's JSK and thus not too much was a surprise when I received it.
Unfortunately I won't be updating with actual pictures of it for this entry because I'm at the coffee shop where I work and without my camera.
But this skirt is absolutely adorable and I'm entirely pleased with it! A hundred dollars for it? Oh Hells yes! The little waist bow IS detachable which saves me the worry of ripping it off in favor of turning it into a hair accessory.
On to other news: Lindsey and I decided to go halves on an Angelic Pretty Dreamy Doll House skirt replica.
This is our first attempt at buying replicas and I'm not sure how good the quality will be but I'm very curious and at twenty dollars each for it, it's not a total loss if I don't like it. I do, however, absolutely love the DDH print, so I'm excited for that!
I think that finally the buying spree is over for the time being though, at least until the 16th when Shane and I get paid again! And once that happens we'll be doing a group order [Shane, myself, and Lindsey] and possibly some of our local lolitas depending on their interest and ordering a few items for Shane's kodona wardrobe and other items! I'm so excited simply for this time of the year and I'm planning on doing orders from Bodyline, Closet Child, ClobbaOnline, and Fan+Friend, so stay tuned for tons of reviews!
Thursday, January 6, 2011
Crafts and Comparisons.
When my Milky Berry OP arrived in the mail I was very interested in how the OP differed from my friend's JSK, and then I figured well... perhaps there are other people who're interested in the differences too! I also decided to do a detail post of my Jewelry Jelly OP as I was comparing the Milky Berry OP to my other newest purchase.
Comparison start! Here are the three dresses. Milky Berry in mint is incredibly vibrant!
The biggest difference I noticed between the two Milky Berry dresses is this: The JSK has a cute bit of lace threaded with ribbon that the hem lace is stitched to. The OP's hem lace is directly stitched to a folded over bit of fabric.
The bodice of the JSK is detailed with the same lace-ribbon-lace sandwich that the hem has.
Let me tell you first that photographing the mint is very difficult because the brightness of the print really washes out pictures. I have adjusted lighting and color the best I can so the color isn't always right for the mint pictures. Anyways, here is the bodice of the OP, the top of it has the same lace-ribbon-lace sandwich that the JSK has above, and a very cute set of three different rows of lace running down the center of the bodice with four little bows [I am very pleased these cannot come untied, I am awful at tying bows]
Here's the picture a little bit darker to show details.
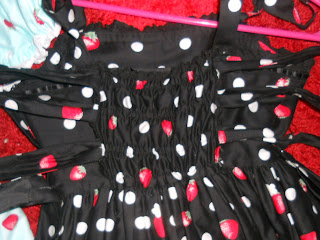
The back of the JSK has only a bit of shirring but it fits to my friend's full C bust perfectly. The shirring is also bordered by three laces that tie into separate bows, which is a bit of a pain being the imperfect bow tie-r that I am.
The back of the OP is just a ton of shirring, which I was surprised by until I realized it was missing a small detail. The OP has no zipper opening, meaning you have to drag the dress up and over your head to get it off, which is actually really difficult especially being such a light print. I wear make-up while in lolita and it's quite the danger trying to get in and out of this without rubbing your face along it. I think that was the biggest disappointment.
Here is the zipper to the JSK, a simple little invisible zipper and a hook and eye closure at the top. The zipper tends to stick slightly at the waist/skirt seam but otherwise is just fine!
The waist ties of the JSK are adorably detailed. The lace is cute little strawberries wearing headbows and bows.
The OP has the same lace on it's waist ties, however it lacks the cute ribbon-lace that it lacks on it's hem.
The prints are gorgeous and equally vibrant, the red just pops against the black JSK.
The mint against the red is crazily vibrant as well. I am pleased with my purchase despite it's slight differences. Both these dresses fit my friend's waist and bust well however I wouldn't recommend them on much larger busts, the JSK would be the most likely to stretch further despite the fact that it has less shirring.
On to the Jewelry Jelly OP
Whenever I noticed all the differences on my mint OP, I decided to give my black one a once-over to see if perhaps Jewelry Jelly wasn't as detailed as I thought.
In all honesty, I cannot say I've ever been disappointed in the details that Jewelry Jelly has, this is the bodice, it's got a double layer of lace.
The sleeves are decked out in bows, detailed lace, this OP has neck ties and shoulder straps which are both removable in addition to the sleeve.
The lace on the sleeves and waist ties have stars.
The lace on the bodice and hem has dots and the Jelly dessert that the print contains.
The end of the neck ties have star charms that match the headbow which has a matching charm.
The waist ties have a little less detailing than the Milky Berry JSK, but the lace is beautiful!
The back of this OP has quite a panel of shirring, the corsetting on the sides is hidden by a bit of scalloped material.
All in all, details of this OP never cease to completely please me!
And here's the adorable print <3!
And since my Title promises that I show off my crafts, I'll treat you to that as well!
I made puffy stars! Forgive the quickly thrown together bit. The stars are actually on pins because I was out of alligator clips, but I wanted to show them off!
It's incredibly difficult to get a proper close up of these because they're so lightly colored, but this is the proper color of them, even though the details are fuzzy.
And here's a detail picture.
I think this one is my favorite, they both have bows, pearls, and rhinestones, as well as puff balls that I had left over from an old craft project.
I have three more that I still need to decorate as well as a few more smaller ones I intend to make, but these two are the fattest, cutest ones I've made thus far!
Thanks guys~!
Comparison start! Here are the three dresses. Milky Berry in mint is incredibly vibrant!
The bodice of the JSK is detailed with the same lace-ribbon-lace sandwich that the hem has.
Let me tell you first that photographing the mint is very difficult because the brightness of the print really washes out pictures. I have adjusted lighting and color the best I can so the color isn't always right for the mint pictures. Anyways, here is the bodice of the OP, the top of it has the same lace-ribbon-lace sandwich that the JSK has above, and a very cute set of three different rows of lace running down the center of the bodice with four little bows [I am very pleased these cannot come untied, I am awful at tying bows]
Here's the picture a little bit darker to show details.
The back of the JSK has only a bit of shirring but it fits to my friend's full C bust perfectly. The shirring is also bordered by three laces that tie into separate bows, which is a bit of a pain being the imperfect bow tie-r that I am.
The back of the OP is just a ton of shirring, which I was surprised by until I realized it was missing a small detail. The OP has no zipper opening, meaning you have to drag the dress up and over your head to get it off, which is actually really difficult especially being such a light print. I wear make-up while in lolita and it's quite the danger trying to get in and out of this without rubbing your face along it. I think that was the biggest disappointment.
Here is the zipper to the JSK, a simple little invisible zipper and a hook and eye closure at the top. The zipper tends to stick slightly at the waist/skirt seam but otherwise is just fine!
The waist ties of the JSK are adorably detailed. The lace is cute little strawberries wearing headbows and bows.
The OP has the same lace on it's waist ties, however it lacks the cute ribbon-lace that it lacks on it's hem.
The prints are gorgeous and equally vibrant, the red just pops against the black JSK.
The mint against the red is crazily vibrant as well. I am pleased with my purchase despite it's slight differences. Both these dresses fit my friend's waist and bust well however I wouldn't recommend them on much larger busts, the JSK would be the most likely to stretch further despite the fact that it has less shirring.
On to the Jewelry Jelly OP
Whenever I noticed all the differences on my mint OP, I decided to give my black one a once-over to see if perhaps Jewelry Jelly wasn't as detailed as I thought.
In all honesty, I cannot say I've ever been disappointed in the details that Jewelry Jelly has, this is the bodice, it's got a double layer of lace.
The sleeves are decked out in bows, detailed lace, this OP has neck ties and shoulder straps which are both removable in addition to the sleeve.
The lace on the sleeves and waist ties have stars.
The lace on the bodice and hem has dots and the Jelly dessert that the print contains.
The end of the neck ties have star charms that match the headbow which has a matching charm.
The waist ties have a little less detailing than the Milky Berry JSK, but the lace is beautiful!
The back of this OP has quite a panel of shirring, the corsetting on the sides is hidden by a bit of scalloped material.
All in all, details of this OP never cease to completely please me!
And here's the adorable print <3!
And since my Title promises that I show off my crafts, I'll treat you to that as well!
I made puffy stars! Forgive the quickly thrown together bit. The stars are actually on pins because I was out of alligator clips, but I wanted to show them off!
It's incredibly difficult to get a proper close up of these because they're so lightly colored, but this is the proper color of them, even though the details are fuzzy.
And here's a detail picture.
I think this one is my favorite, they both have bows, pearls, and rhinestones, as well as puff balls that I had left over from an old craft project.
I have three more that I still need to decorate as well as a few more smaller ones I intend to make, but these two are the fattest, cutest ones I've made thus far!
Thanks guys~!
Subscribe to:
Posts (Atom)