As there was some interest in my puffy stars, I'm making a tutorial on how to make them! This is the first time I've thrown together a tutorial, so if you have any questions or something's not clear enough just ask! <3
Things You'll Need:
- Yarn [This is the kind I'm using]
- Plastic Canvas [Stars here. This is available at my local Joann's in multiple sizes and shapes including large mats that can be cut into any shape and size!]
- Hot Glue Gun
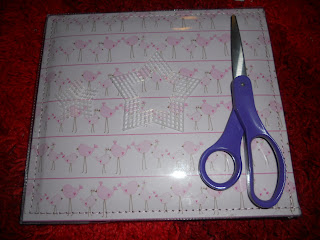
- Scissors
- Alligator Clips or Brooch Pins
[Not Pictured]
- Decorating items, pearls, beads, rhinestones, puff balls, etc.
To make the exact ones I'm making I used the Star plastic canvas as shown here and cut out the middle of it.
After a few test stars I found that the best star-thickness, personally, is leaving the outside star at least three squares wide, any thinner and you get some pretty scrawny stars.
The smaller star you'll put aside for now, but can be used to make a two-set 'dangle' charm that I have yet to perfect.
I cut out my yarn in arm lengths, length doesn't really matter but I wouldn't suggest going much smaller as the more separate pieces you use, the lumpier the star will be. But don't go too big or you'll be tangling yourself up in the yarn! Haha.
I have a needle used for cross-stitching, it has a large eye and it mostly blunt-tipped, perfect for this craft! Thread the needle like you would if you were hand stitching, IE pull the needle through to the middle of your length of yarn and fold it over, do not knot the end!
I start in the middle of a pair of the star's 'arms', put the needle through, pull it until just about a half inch of yarn is left on the other side...
Bring the yarn over the top of the edge of the star, and back up the underside, so you're effectively covering the entire side of the star in material.
You'll get a star like this, it covers all the edges of the plastic canvas and adds to the fluff of the final project. You can choose to cut the thread here and the same half inch of extra yarn, or if you have enough yarn, you can start on the center of the star, doing the same exact thing. Up through, around the edge, and up through again.
You will have a star like this!
Trim off the excess, as long as you don't give the yarn too much of a tug through the next few steps, you'll have no problem with unraveling because the fluffy yarn tends to knot up a little bit and keep itself in place.
Next we're rethreading the needle and going back at the star, this time through the center row that should not have any yarn in it. We're going to thread it under and over to cover up the majority of the plastic, but not all of it.
Your star will end up like this. Take the ends from all the previous steps [all those little threads that are dangling about] and give them a nice dot of hot glue on one side of the star that will be the 'bottom' [this doesn't really matter as it's almost impossible to see the hot glue if you're delicate about it and your yarn is as fluffy as mine].
Your next step is to braid three pieces of yarn together and proceed to simply wrap it around the star, this will add puffiness and it isn't a time-consuming thing. If the yarn attempts to slide about, you'll need to pull it a bit tighter. A small dab of hot glue towards the points of the star will make sure the yarn stays in place and doesn't turn into a ball.
Your star will end up looking like this, if everything works out!
One thing you'll have to watch out for in this process is losing your patience. The yarn will have a tendency to get bunched up as you're pulling it through the canvas's holes. Simply stop, give the yarn a tug to untangle it, and go again. The lesser the amount you're working with, the easier it will be to thread your star.
After all of this you can go crazy, deck them out with rhinestones, puff balls, pearls, cabochons, bows, etc! A little dab of hot glue will keep these things in place rather well.
Sunday, January 9, 2011
Subscribe to:
Post Comments (Atom)


11 comments:
Thank you so much for this tutorial! I've been wondering how to make these for so long.
I want to try making these now! I've been wanting one for awhile now! ^^ ♥
I have a question- the yarn red heart baby clouds in reality looks different than the yarn that you are using here- it's less fuzzy. Did they change the make of the yarn?
I'm not sure if they've changed it, however I did get it on an extreme sale, perhaps they did change it? Unfortunately I'm not in a position to check the local Joann's for it again...
Either way any kind of yarn with fuzzy fibers will work, especially if it's supposed to be a 'baby' yarn, because then it'll also be pastel colors! If you find your project not turning out as fuzzy as mine using a fine tooth comb and just raking it over the surface of the star will ensure the fibers don't get stuck in the stitches.
Ahh, thanks so much for the tutorial!
I saw a bunch of these recently and I really wanted to try it myself~
Thanks a bunch!~
these are awesome...sorry this is late but i love these it saved me money and they are really freaking cute <3
Thank you very much for this tutorial, it's so fun to make and looks great with my sweet coords :3
Ingenius!!! Thank you so much for taking the time to share.
hey im planning on making some of these but im also interested in using darker colors, preferably some in black, any clue on what kind of yarn to use that would be closest to what you use? thanks!
Thank you so much for sharing! I've always wanted to know how to make one of these and thanks to you, I can add these to my collection~
Hi! Congratulations from Brazil! Really really loved this idea, thanks!
Can I translate it for my blog? I'll give you credits, please answer ~ :3
Post a Comment